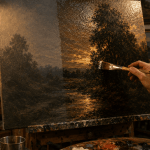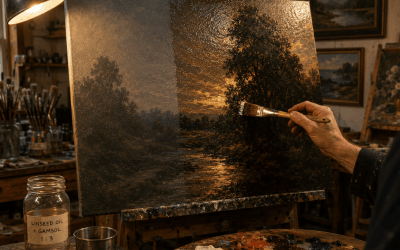
Oil paint adhesion problems are among the most frustrating issues artists encounter. Paint may slide across the surface instead of gripping properly, lift while adding additional layers, or separate from the canvas entirely. These problems are often caused by overly slick surfaces, improper layering techniques, excessive medium usage, poorly prepared canvases, or painting over unstable paint films that have not cured correctly.
Understanding how oil paint bonds to a surface is essential for creating stable and workable paintings. Surface preparation, paint thickness, drying stages, and medium control all affect how well oil paint adheres between layers. In many cases, improving paint adhesion comes from adjusting the painting foundation rather than changing the paint itself.
Even experienced painters occasionally encounter adhesion problems while experimenting with new techniques, mediums, or painting surfaces. Fortunately, most adhesion issues can be corrected once the cause is identified.
Paint Sliding Across the Canvas
One of the most common adhesion problems occurs when oil paint slides across the canvas surface instead of gripping properly. Rather than feeling controllable, the paint smears, streaks, or glides across the surface while brushing. Artists may notice that the paint feels difficult to direct or appears to “float” over the canvas instead of attaching naturally to it.
This issue is especially common when painting on overly smooth commercial canvases or surfaces that lack enough tooth to properly grip oil paint.
What Causes It
Several surface-related conditions can cause oil paint to slide across the canvas:
- Overly slick commercial gesso
- Insufficient surface tooth
- Overly smooth primed surfaces
- Oily contamination on the canvas
- Non-absorbent painting surfaces
- Improperly prepared canvases
Some commercially prepared canvases are manufactured with very smooth acrylic gesso surfaces that work well for acrylic paint but may feel slippery when applying oil paint. In other situations, oil from hands, cleaning products, or studio contamination may leave a thin residue that interferes with paint adhesion.
If working on a new blank canvas that feels overly smooth or resistant, applying an additional coat of quality acrylic gesso and lightly sanding between coats can improve surface tooth and help oil paint grip more evenly.
How to Fix It
If the paint is actively sliding during application:
- Lightly wipe the surface with a clean lint-free cloth
- Allow any oily contamination to dry or dissipate fully
- Lightly sand overly smooth surfaces
- Apply an additional coat of quality gesso if necessary
- When adding a wash adjust solvent ratios if extremely thin paint begins separating or resisting the canvas surface
If the surface has already dried but still feels unusually slick or resistant, lightly sanding the area with very fine 400–600 grit sandpaper can improve surface tooth and help fresh paint grip more effectively. Sand gently and avoid aggressive pressure that could damage the canvas or remove too much primer.
In many situations, improving the physical texture of the surface alone dramatically improves paint control and adhesion.
How to Prevent It
Many surface adhesion problems can be prevented during canvas preparation.
To improve paint grip:
- Lightly sand overly smooth commercial canvases before painting
- Apply additional gesso coats when needed
- Avoid contaminating the canvas surface with oils or residue
- Choose surfaces appropriate for oil painting
- Test unfamiliar painting surfaces before beginning important work
Many artists discover that slight surface preparation adjustments greatly improve brush control and paint handling.
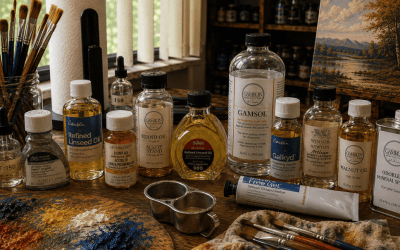
Helpful Materials or Techniques
- Fine sanding sponge or 400–600 grit sandpaper
- Professional acrylic gesso
- Oil ground for smoother professional surfaces
- Proper canvas preparation techniques
- Bristle brushes for improved paint control
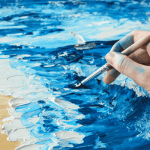
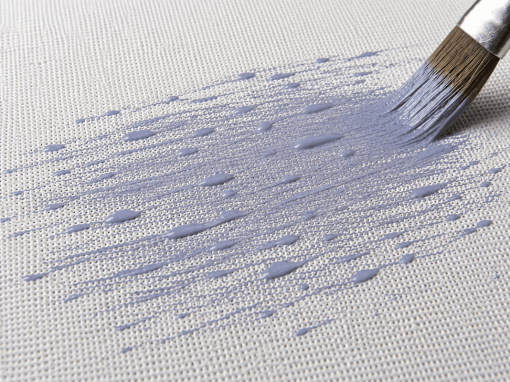
Paint Separating Into Streaks or Beads
Some artists notice that highly thinned oil paint does not spread evenly across the painting surface. Instead of forming a smooth continuous layer, the paint separates into streaks, translucent patches, small droplets, or uneven bead-like formations. The paint may appear to retract from the surface while brushing, leaving broken paint coverage and uneven application.
This issue commonly occurs during lean underpainting stages or while using excessively solvent-heavy paint mixtures.
What Causes It
Several medium-related conditions can cause oil paint to separate into streaks or beads:
- Overly solvent-heavy paint mixtures
- Extremely lean underpainting washes
- Weak paint cohesion from excessive thinning
- Over brushing thin paint films
- Excessive turpentine or solvent in the medium
- Paint mixtures becoming underbound
When oil paint becomes heavily diluted with solvent, the paint film may lose enough cohesion that surface tension begins dominating the paint behavior. Instead of remaining evenly distributed, the paint can begin separating into irregular streaks, elongated droplets, and translucent channels while the brush moves across the surface.
In many cases, the paint initially appears to apply normally before the thinner medium begins redistributing and the paint film starts retracting unevenly.
How to Fix It
If the paint begins separating during application:
- Reduce excessive solvent ratios
- Allow the paint mixture to retain slightly more body
- Apply the paint more sparingly
- Avoid flooding the surface with thin paint
- Use controlled brush passes instead of repeated brushing
- Rebalance the paint-to-medium ratio before continuing
In many situations, repeatedly brushing the area worsens the problem by redistributing the already unstable paint film. Thin paint layers should be applied gently and with controlled brushwork rather than aggressively worked into the surface.
Sometimes only a small adjustment to the solvent ratio is needed to restore proper paint cohesion and improve how the paint handles during application.
How to Prevent It
To reduce streaking and bead-like paint separation:
- Maintain balanced lean paint mixtures
- Avoid over-thinning paint with excessive solvent
- Preserve enough paint cohesion during early layers
- Apply lean washes in controlled thin applications
- Test unfamiliar medium ratios before large applications
- Increase medium gradually instead of drastically
Many artists unintentionally create this problem while attempting to follow fat-over-lean principles by using extremely diluted paint mixtures. Lean painting methods remain highly effective, but the paint must still retain enough cohesion to remain stable during application.
Helpful Materials or Techniques
- Moderate solvent usage
- Controlled lean underpainting methods
- Bristle brushes for improved paint control
- Balanced paint-to-solvent ratios
- Small test mixtures before major painting sessions
- Consistent medium recipes between painting sessions
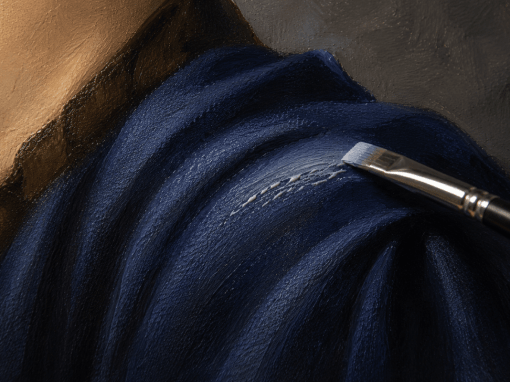
Paint Lifting While Adding New Layers
Another frustrating issue occurs when fresh paint begins lifting or disturbing previous layers while painting. Instead of building paint smoothly, the brush pulls partially dried paint away from the canvas.
This often happens during wet-on-wet painting or when the lower layer has not cured enough to support additional paint.
What Causes It
Common causes include:
- Reworking semi-dry paint
- Excess solvent weakening lower layers
- Overbrushing the same area repeatedly
- Thin underlayers becoming unstable
- Applying heavy paint over weak paint films
Oil paint cures slowly through oxidation rather than evaporation. Even when the surface feels dry to the touch, the paint beneath may still be soft.
How to Fix It
If lifting begins during painting:
- Stop brushing the area immediately
- Allow the painting to dry longer before continuing
- Remove unstable paint carefully if necessary
- Reapply paint using softer brush pressure
- Use thicker paint mixtures rather than overly solvent-heavy mixtures
If the lower paint layer begins lifting while working, continuing to brush the area usually makes the problem worse. Allow the surface to dry longer before attempting corrections. Oil paint may feel dry to the touch while remaining soft beneath the surface, especially in thicker passages.
When repainting, use controlled brush pressure and avoid scrubbing the paint aggressively. In many situations, simply allowing additional drying time resolves the issue without requiring major correction.
How to Prevent It
To reduce paint lifting problems:
- Avoid overworking partially cured paint
- Use solvents sparingly
- Build paint gradually in layers
- Follow fat-over-lean principles
- Allow proper drying time between stages
Many painters accidentally create lifting problems by trying to correct areas too quickly.
Helpful Materials or Techniques
- Alkyd mediums for controlled drying
- Soft filbert brushes
- Limited solvent usage
- Thin early layers with stronger upper paint films
- Controlled wet-on-wet technique
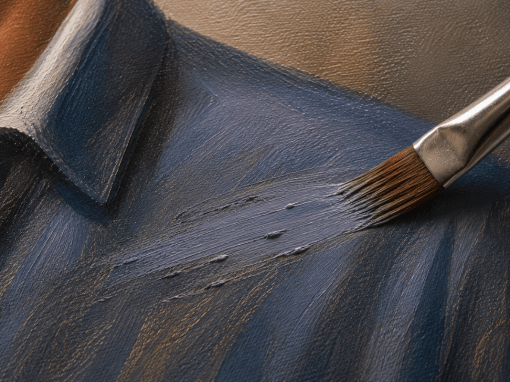
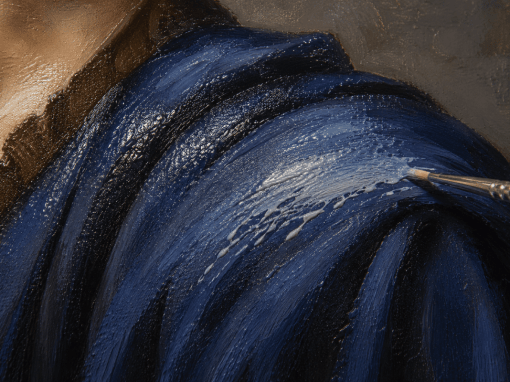
Paint Refusing to Stick to Previous Layers
Some artists notice that fresh paint beads up, separates, or refuses to attach evenly to previous paint layers. Instead of blending smoothly, the fresh paint may streak unevenly, slide across the surface, or disturb the paint beneath it.
This issue commonly occurs when painting over glossy, oily, or insufficiently cured paint layers.
What Causes It
This problem is commonly caused by:
- Excess oil in previous paint layers
- Improper oiling-out techniques
- Painting over uncured paint
- Glossy sealed paint films
- Solvent-weakened lower paint layers
- Partially cured underlying paint
Oil paint cures slowly through oxidation, and lower paint layers may remain soft beneath the surface long after appearing dry to the touch. If the underlying layer contains excessive oil or remains insufficiently cured, fresh paint may struggle to grip the surface properly.
How to Fix It
Possible solutions include:
- Allow the painting to cure longer before repainting
- Wipe excess surface oil carefully with a lint-free cloth
- Apply only a very thin oiling-out layer if needed
- Lightly scuff fully cured glossy areas before repainting
- Avoid overworking partially cured paint layers
If the surface appears excessively glossy or oily, additional drying time is often the safest solution. Attempting to force fresh paint onto unstable lower layers usually worsens adhesion problems and may disturb partially cured paint beneath the surface.
When lightly sanding glossy cured areas, use extremely fine sandpaper and avoid aggressive sanding that could damage the paint film.
How to Prevent It
To improve paint adhesion between layers:
- Use controlled oiling-out methods
- Allow proper curing time between painting sessions
- Maintain stable layered paint structure
- Build paint films gradually and consistently
- Avoid trapping excessive oil between layers
Many interlayer adhesion problems improve naturally as artists become more familiar with paint drying behavior, curing stages, and surface condition changes between painting sessions.
Helpful Materials or Techniques
- Lint-free cloths
- Walnut alkyd mediums
- Moderate oiling-out methods
- Soft synthetic brushes
- Controlled layered painting techniques
- Fine grit sanding sponge for glossy cured areas
Common Beginner Mistakes That Cause Adhesion Problems
Many oil paint adhesion issues come from a few very common habits:
- Using too much linseed oil too early
- Painting over uncured paint
- Overusing solvents
- Applying thick paint over thin unstable layers
- Using slick commercial canvases without preparation
- Reworking paint excessively
- Attempting to fix areas before they fully dry
These mistakes are extremely common while learning oil painting techniques. Most artists encounter at least some of them during their development.
The good news is that most of these problems improve naturally as artists become more familiar with paint consistency, drying behavior, and surface preparation.
Key Takeaway
Most oil paint adhesion problems begin with unstable painting surfaces, excessive medium usage, or improper layering techniques. Understanding how oil paint grips, cures, and bonds between layers can dramatically improve paint control and long-term painting stability.
In many cases, the problem is not the paint itself but the surface beneath it or the way the paint is being handled.
The good news is that most adhesion problems can be corrected once the cause is identified. Careful surface preparation, balanced paint mixtures, controlled medium usage, and patience during drying stages can prevent many of the frustrations artists experience while learning oil painting.
Explore More
Disclaimer
This page may contain Amazon advertisements or affiliate links; however, the article content itself is not sponsored by or affiliated with Amazon. Product availability and pricing, where shown, are provided for general informational purposes and may vary over time. All information reflects conditions at the time of posting and is subject to change without notice.