
Oil paintings do not always dry with an even appearance. Some areas may remain rich and glossy while others become dull, flat, or chalky looking. This uneven surface appearance is commonly called “sinking in” or “sunken paint.” Dark passages usually reveal the problem the most.
One technique artists use to temporarily restore color depth and surface consistency is called oiling out. When done properly, oiling out can help revive dull areas, improve color judgment, and create a more even working surface before continuing a painting.
However, oiling out is also one of the most misunderstood techniques in oil painting. Applying too much oil, using the wrong medium, or allowing a thick oily layer to remain on the surface can create future problems.
In this guide, we will explain what oiling out is, when it should be used, how to do it safely, and what mistakes to avoid.
What Is Oiling Out in Oil Painting?
Oiling out is the process of applying a very thin layer of oil or painting medium over a dry or touch-dry oil painting surface to temporarily restore richness and an even sheen.
The goal is not to create a thick glossy coating. Instead, the purpose is to lightly revive dull or sunken paint so the artist can better judge values, colors, and blending while continuing work.
Many painters oil out before:
- Continuing another painting session
- Applying glazes
- Adjusting color balance
- Refining details
- Photographing a work in progress
When done correctly, the painting surface should appear refreshed but not overly wet or greasy.
Oiling Out Is Not the Same as Varnishing
Many beginners confuse oiling out with varnishing, but they serve very different purposes.
Oiling out is a temporary working process used during painting. Final varnishing is a protective finish applied only after the painting has fully cured, which may take several months.
Oiling out also differs from applying oil to a blank canvas before painting. That process relates more to surface preparation, while oiling out is used on an already painted surface.
Why Oil Paintings Develop Dull or Sunken Areas
Oil paint does not always dry evenly. Some areas absorb more oil into the underlying surface or previous paint layers, leaving parts of the painting looking dry and lifeless.
This happens for several reasons.
Absorbent Grounds or Underlayers
Some gessoed canvases and underpaintings absorb oil more aggressively than others. As the oil is pulled away from the upper paint layer, the surface may lose richness and become dull.
Solvent-Heavy Painting Methods
Using excessive solvent can weaken or over-thin paint layers. This often leaves paint films looking dry or chalky after curing.
Lean Paint Mixtures
Very lean paint mixtures contain less oil binder. While lean layers are important early in a painting, excessively lean passages may sink in more noticeably.
Pigment Differences
Certain pigments naturally dry differently than others. Dark colors often reveal sheen inconsistencies more clearly.
Uneven Drying
Some paint areas dry faster or absorb differently depending on thickness, medium use, humidity, and temperature.
A painting may look perfectly fine under one lighting condition but reveal dull patches under side lighting or reflected light.
When Should You Oil Out a Painting?
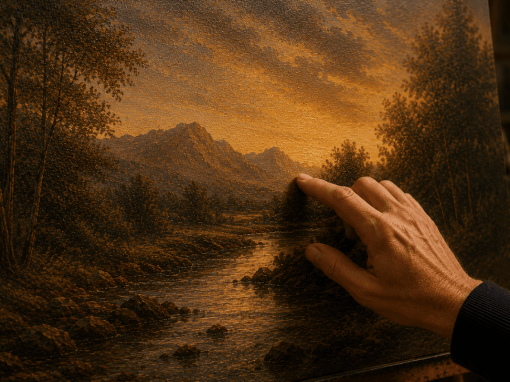
Oiling out is usually done after earlier paint layers have become touch dry. The surface should not feel soft, sticky, or tacky before applying any oiling-out layer. If paint transfers onto your finger when lightly touched, the painting needs more drying time.
Common Times Artists Oil Out
Artists commonly oil out:
- Before continuing work on a partially dry painting
- Before glazing
- Before refining details
- Before correcting color relationships
- Before photographing a painting
- When sunken areas make value judgment difficult
Drying Time Matters
Drying time varies depending on:
- Paint thickness
- Pigment type
- Humidity
- Temperature
- Mediums used
- Air circulation
Thin layers may become touch dry within days, while thicker passages can require much longer.
When in doubt, waiting longer is usually the safer choice.
How to Oil Out an Oil Painting
Oiling out should always be done carefully and sparingly. The process is simple, but using too much medium is one of the most common mistakes beginners make.
Step 1 — Make Sure the Painting Is Dry Enough
The painting should be touch dry before oiling out. This means:
- The surface does not feel tacky
- Paint does not lift when lightly touched
- The paint layer feels stable
- Thin layers have cured enough to handle light surface contact
Be especially careful around thick impasto passages. Paint may feel dry on the surface while remaining soft underneath.
Step 2 — Choose an Appropriate Oiling-Out Medium
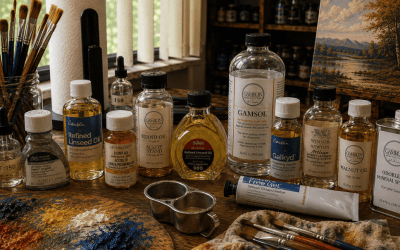
Artists use different mediums depending on their painting method. Common choices include:
- Refined linseed oil
- Walnut oil
- A small amount of painting medium
- Very thin oil-and-solvent mixtures used sparingly
Suggested Medium Ratios
Many artists prefer using a lean oil-and-solvent mixture when oiling out because it reduces the chance of applying excessive oil to the surface. A common starting mixture is:
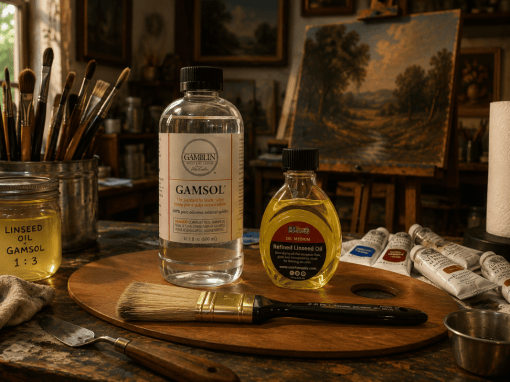
- 1 part refined linseed oil to 3 parts odorless mineral spirits or Gamsol
Some painters use slightly richer mixtures such as 1:1 or 1:2, but leaner mixtures are generally safer for reducing excess oil buildup.
If using walnut oil instead of linseed oil, artists often use similar lean ratios because walnut oil naturally dries somewhat slower and remains smoother in handling. A practical starting point is:
- 1 part walnut oil to 3 or 4 parts odorless mineral spirits or Gamsol
The exact ratio often depends on:
- How absorbent the painting surface is
- How much oil already exists in earlier layers
- The artist’s preferred brush feel and drag
Some artists also prefer modern gel mediums such as oleogels because they provide better control and reduce the risk of over-application.
Regardless of the medium used, the goal is always the same: apply the thinnest possible layer needed to restore the surface without leaving excess oil behind.
The key is moderation.
More oil does not improve the process. Excess oil can create future cracking, wrinkling, adhesion problems, or sticky surfaces.
Step 3 — Apply an Extremely Thin Layer
Apply a very small amount of medium using:
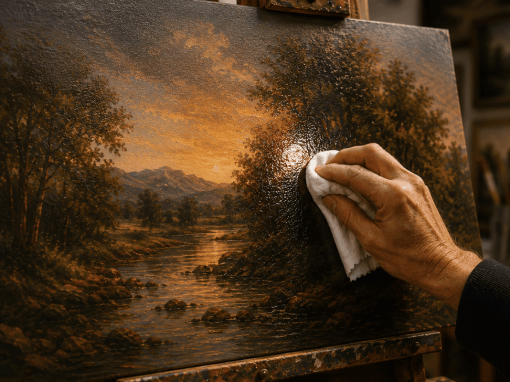
- A soft lint-free cloth
- A soft synthetic brush
- A makeup sponge or pad
Many artists apply oiling-out medium only to the specific areas they plan to continue working on rather than coating the entire painting. This helps reduce unnecessary oil buildup and gives the artist better control over the working surface.
Work the medium gently across the surface.
The painting should appear revived, not soaked.
There should never be visible pools or standing liquid on the surface.
Step 4 — Wipe Away Excess Oil
This is one of the most important steps.
After application, wipe the surface back down with a clean lint-free cloth.
The goal is to leave only a microscopic film of medium behind.
If the painting looks heavily wet or feels greasy, too much medium has been applied.
Many long-term painting problems come from leaving excessive oil sitting on the surface.
Step 5 — Resume Painting
Oiling out is generally intended as a working process rather than a separate drying layer. Traditionally, oiling out is intended to be painted into while still fresh rather than left as a separate dried layer across the painting surface.
After wiping away excess medium, artists usually continue painting relatively soon afterward instead of allowing the oiling-out layer to fully dry on its own.
Allowing a heavier oiling-out layer to dry without painting over it can create unnecessary oil buildup and may contribute to future adhesion or surface stability problems.
Many artists continue painting shortly after wiping away excess oil.
A properly oiled-out surface often:
- Restores color depth
- Improves blending
- Makes dark values easier to judge
- Creates a more visually even working surface
- Helps glazing layers appear richer
The painting should feel refreshed, not slippery or flooded with oil.
What to Avoid When Oiling Out
Oiling out can be extremely helpful when used correctly. However, improper use can create avoidable problems.
Do Not Leave a Thick Oily Layer
Oiling out is not intended to create a separate cured layer. Leaving thick oil on the surface can:
- Slow drying dramatically
- Cause wrinkling
- Create sticky areas
- Increase cracking risk later
- Weaken paint structure
The surface should never appear heavily coated.
Do Not Oil Out Over Wet Paint
Applying oil over paint that is still wet can:
- Smear paint layers
- Lift color unintentionally
- Create muddy mixtures
- Disturb brushwork
- Cause uneven drying
Always allow the painting to become touch dry first.
Avoid Oiling Areas That Are Already Glossy
Not every section of a painting needs to be oiled out.
Areas that already appear glossy or slightly oil-rich often contain enough binder and may still be actively curing beneath the surface. Applying additional oil to these passages can create an overly slick surface and may slow drying unnecessarily.
Many artists oil out only the dull or sunken areas that need color and sheen restored rather than coating the entire painting evenly. This selective approach helps:
- Reduce excess oil buildup
- Improve painting control
- Maintain better surface stability
- Prevent overly greasy passages
If an area still feels tacky or appears freshly glossy, it is often better to leave it alone and allow additional drying time before continuing work there.
Do Not Use Excessive Solvent
Some artists use solvent-heavy mixtures when oiling out, but excessive solvent use can create problems. Too much solvent may:
- Over-thin paint films
- Increase dullness again later
- Reduce paint strength
- Dry surfaces unevenly
Moderation is important.
Do Not Confuse Oiling Out With Final Varnishing
Final varnish protects a completed painting.
Oiling out is only a temporary working technique used during the painting process.
A painting should fully cure before receiving a final varnish.
Helpful Materials and Tools for Oiling Out
The materials used for oiling out do not need to be complicated.
Helpful Studio Items
- Refined linseed oil
- Walnut oil
- Artist painting medium
- Soft lint-free cloths
- Soft synthetic brushes
- Nitrile gloves
- Paper shop towels
- Small glass palette cups
Beginner-Friendly Advice
Soft lint-free cloths are often one of the safest and easiest application methods for beginners because they help prevent over-application.
If using brushes, avoid overloaded bristles that leave visible wet streaks.
Always work with clean materials to avoid introducing dust, lint, or dried paint particles into the painting surface.
Oiling Out vs Varnishing
Although they may appear visually similar at first, oiling out and varnishing serve different purposes.
Oiling Out
Temporary working process
Used during painting
Restores dull paint temporarily
Applied very thinly
Often wiped back off
Helps continue painting
Varnishing
Final protective coating
Used after full curing
Protects painting long term
Applied as a finish layer
Intended to remain
Helps preserve finished artwork
Is Oiling Out Always Necessary?
No. Some artists rarely oil out, while others use the technique regularly.
Painting style, surface preparation, paint handling, and medium choice all influence how often sunken areas appear.
Painters working on highly absorbent surfaces may encounter dullness more frequently. Artists using very lean painting methods may also notice more sinking in.
Some painters prefer to avoid oiling out whenever possible by carefully controlling their paint mixtures and surface preparation from the beginning.
Others consider it a normal and useful part of their workflow.
Neither approach is automatically wrong.
Professional Tips for Better Results
Use Side Lighting
Side lighting helps reveal uneven sheen and sunken areas more clearly.
Test a Small Area First
If uncertain about a medium, test a small corner before applying it broadly.
Keep the Application Extremely Thin
The best oiling-out layers are often barely noticeable.
Dark Colors Reveal Problems Faster
Dark passages usually show dullness more clearly than lighter passages.
Avoid Repeated Heavy Oiling Out
Repeatedly applying excessive oil to the same area can create long-term instability.
Keep Notes About Your Mediums
Recording which mediums and surfaces behave well together can help improve consistency over time.
Troubleshooting Common Oiling-Out Problems
Why Does My Painting Still Look Dull After Oiling Out?
Possible causes include:
- Earlier layers were excessively lean
- The ground is highly absorbent
- Too much medium was wiped away
- Paint layers are still drying unevenly
- Solvent-heavy methods weakened the surface appearance
Why Does My Painting Feel Sticky?
Possible causes include:
- Too much oil was applied
- Excess medium was not wiped away
- Thick underlying paint is still curing
- The studio environment is too cold or humid
Why Do Dark Areas Sink In More?
Dark passages reveal sheen differences more clearly than lighter colors.
Certain dark pigments may also absorb and dry differently than surrounding paint.
Final Thoughts on Oiling Out an Oil Painting
Oiling out is a useful technique that helps restore color richness and surface consistency while continuing an oil painting.
When used carefully, it can improve blending, glazing, and overall color judgment. However, the process should always remain controlled and minimal.
The biggest mistake artists make is applying too much oil.
A successful oiling-out layer should be extremely thin, lightly wiped back, and used only when necessary.
Understanding how and when to oil out properly can help painters maintain stronger paint structure while improving the appearance and workflow of their paintings.
Explore Oil Painting Supplies and Studio Tools
Quality painting materials can make techniques like oiling out easier and more predictable. Brushes, painting mediums, lint-free cloths, palette tools, and properly prepared surfaces all play a role in how an oil painting behaves over time.
Explore oil painting supplies, mediums, brushes, and studio tools to help support your workflow and painting process.
Explore More
Disclaimer
This page may contain Amazon advertisements or affiliate links; however, the article content itself is not sponsored by or affiliated with Amazon. Product availability and pricing, where shown, are provided for general informational purposes and may vary over time. All information reflects conditions at the time of posting and is subject to change without notice.