

Why Oil Paint Dries Too Slowly — Common Drying and Consistency Problems Explained
May 14, 2026

We may earn a commission if you make a purchase through one of our links. Learn more

See what more Amazon brings to you!

Banner promoting Amazon Outlet with overstock items offered at greatly reduced prices.

Oil paint behaves very differently than acrylic or watercolor paint. It dries slowly, changes consistency over time, and reacts differently depending on the pigments, mediums, solvents, environment, and painting techniques being used. While these slower drying properties are part of what makes oil painting so enjoyable for blending and layering, they can also create frustration when the paint becomes sticky, tacky, watery, wrinkled, or difficult to control.

Many beginners assume something is wrong when oil paint remains wet for several days, feels draggy on the brush, or dries unevenly across the canvas. In reality, many of these issues are common and often come from misunderstandings involving paint structure, medium usage, layering methods, or curing behavior.

This guide explains some of the most common oil painting drying and consistency problems artists encounter, what causes them, how to fix them, and how to avoid them in future paintings.

Why Oil Paint Dries Too Slowly

Oil paint naturally dries much slower than many beginners expect. Depending on paint thickness, pigment type, medium usage, and environmental conditions, some oil paintings may remain workable for several days while thicker passages can take weeks or even months to fully cure. Slow drying is often caused by excessive oil usage, heavy paint application, poor airflow, or slow-drying pigments such as Ivory Black or Alizarin Crimson.

Understanding how oil paint cures can help artists better control layering and workflow. Oil paint does not dry through evaporation like acrylic paint. Instead, it cures slowly through oxidation as oxygen interacts with the oil binder over time.

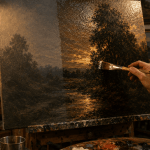
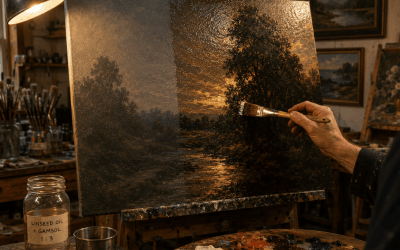
Oil painting in artist studio showing thick textured paint drying slower than thinner paint layers
Thicker paint applied to the trees and shoreline dries more slowly than the thinner paint used in the sky and water areas of the painting.

Oil paint naturally dries much slower than many beginners expect. Depending on paint thickness, pigment type, medium usage, and environmental conditions, some oil paintings may remain workable for several days while thicker passages can take weeks or even months to fully cure. Slow drying is often caused by excessive oil usage, heavy paint application, poor airflow, or slow-drying pigments such as Ivory Black or Alizarin Crimson.

Understanding how oil paint cures can help artists better control layering and workflow. Oil paint does not dry through evaporation like acrylic paint. Instead, it cures slowly through oxidation as oxygen interacts with the oil binder over time.

What Causes It      

  • Excessive linseed oil or stand oil usage
  • Thick paint applications
  • Slow-drying pigments
  • Cold or humid studio conditions
  • Poor airflow around the painting
  • Excessively fat paint mixtures

How to Fix It

  • Move the painting to a warmer room with steady airflow and lower humidity
  • Apply paint in thinner layers whenever possible
  • Reduce excessive oil medium usage
  • Use alkyd mediums such as Winsor & Newton Liquin for faster drying when appropriate
  • Avoid stacking thick wet layers too quickly

If a painting is remaining wet longer than expected, resist the temptation to keep adding more medium or solvent to “fix” the paint. Allowing the paint time to stabilize often produces better long-term results.

How to Prevent It

  • Use leaner mixtures during early painting stages
  • Build thickness gradually rather than immediately applying heavy paint
  • Maintain stable room temperatures, steady airflow, and lower humidity levels
  • Learn which pigments naturally dry slower
  • Use fast-drying mediums strategically during blocking-in stages

Helpful Materials or Techniques

  • Winsor & Newton Liquin
  • Alkyd mediums
  • Balanced linseed oil and odorless mineral spirit medium mixtures
  • Stable studio temperature, airflow, and humidity control
  • Thin layered painting methods

Sticky or Tacky Paint That Never Seems to Cure

Some oil paintings may feel dry on the surface while remaining soft or tacky underneath for extended periods of time. This often happens when paintings contain excessive oil medium, overly thick paint layers, or slow-drying glossy mediums such as stand oil. In some cases, artists unintentionally create unstable paint films by continually adding oil in an attempt to improve blending or paint flow.

Paint that remains tacky for too long can make layering difficult and may increase the risk of wrinkling, dust contamination, or future surface instability.

Artist attempting detail work over tacky dark oil paint causing unwanted blending and muddy color mixing
Applying lighter paint over partially cured dark oil paint can disturb the soft underlayer, causing unwanted blending and muddy color contamination.

What Causes It

  • Too much linseed oil
  • Heavy stand oil application
  • Thick glossy paint layers
  • Excessive medium-to-paint ratios
  • Cool or humid drying environments
  • Painting over partially cured paint

How to Fix It

  • Move the painting to an area with lower humidity and stable airflow
  • Allow additional curing time before continuing work
  • Avoid applying varnish too early
  • Reduce medium usage in future layers
  • Lightly oil out only when necessary rather than flooding the surface with medium

Many artists use stand oil intentionally to increase gloss and extend blending time, especially during glazing or detailed finishing work. However, thicker stand oil applications can remain tacky significantly longer than leaner mixtures.

How to Prevent It

  • Use medium sparingly
  • Build layers gradually following fat-over-lean principles
  • Avoid excessively glossy paint mixtures in early layers
  • Allow each major layer time to stabilize before continuing
  • Test the surface gently before applying additional layers

Helpful Materials or Techniques

  • Refined linseed oil
  • Stand oil
  • Walnut oil
  • Winsor & Newton Liquin
  • Controlled medium ratios

Wrinkled Oil Paint Surfaces

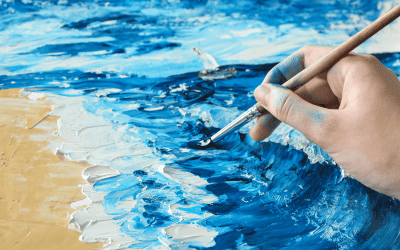
Wrinkling occurs when the upper paint surface dries faster than the softer paint underneath. The outer layer begins forming a skin while the paint beneath continues moving or curing, eventually causing visible wrinkles, ridges, or collapsed paint textures. This problem commonly appears in thick paint passages, heavy impasto work, or paint mixtures containing excessive oil medium.

Wrinkled paint may initially appear glossy and attractive while wet, but over time it can become structurally unstable and difficult to correct.

Oil painting showing subtle wrinkled paint surface in dark foreground caused by thick paint and uneven drying
Excessively thick paint or heavy medium application can cause the upper paint surface to dry faster than the softer paint underneath, resulting in subtle wrinkling across darker passages.

What Causes It

  • Thick paint applications
  • Excessive oil medium usage
  • Heavy impasto painting
  • Fast surface drying over soft underlayers
  • Applying thick paint over uncured paint

How to Fix It        

  • Allow the paint to fully cure before attempting corrections
  • Remove severely unstable paint if necessary
  • Reduce excessive paint buildup in future layers
  • Reduce medium usage in thick passages
  • Build texture gradually rather than all at once

Alkyd mediums can help accelerate drying in thicker paint applications, but they should still be used in balanced amounts to avoid creating overly slick or unstable paint surfaces.

How to Prevent It

  • Apply thick paint more gradually
  • Avoid flooding paint with oil medium
  • Allow underlayers adequate drying time
  • Use moderate impasto techniques
  • Maintain consistent paint structure across layers

Helpful Materials or Techniques

  • Alkyd impasto mediums
  • Controlled impasto layering
  • Palette knife applications
  • Moderate paint thickness

Good airflow and drying conditions

Paint That Feels Too Thin or Watery

Oil paint that feels overly thin, weak, or watery can become difficult to control and may lose covering strength on the canvas. This problem most commonly appears during early blocking-in or underpainting stages when artists use excessive solvent in an attempt to create very lean paint washes. While lean early layers are important in oil painting, overly solvent-heavy mixtures can weaken paint structure and make the paint difficult to control.

As paintings progress into later layers, excessively thinning paint with solvent becomes increasingly problematic and may contribute to weak paint films, poor adhesion, and fat-over-lean issues.

Artist applying an overly thin solvent-heavy oil paint wash during early landscape underpainting stages
Excessive solvent use during early underpainting stages can create weak paint coverage, uneven transparency, and poor paint control across the canvas surface.

What Causes It

  • Excessive solvent usage
  • Overly lean paint mixtures
  • Insufficient paint load
  • Overthinning during underpainting stages
  • Trying to spread paint too far across the surface

How to Fix It

  • Add additional paint rather than more solvent
  • Use moderate solvent ratios
  • Allow weak layers to dry before repainting
  • Build paint gradually in controlled layers
  • Maintain enough body in the paint mixture for proper coverage

A lean mixture does not mean turning oil paint into watercolor. Even early layers should still maintain enough binder and pigment strength to form stable paint films.

How to Prevent It         

  • Use solvent conservatively
  • Keep paint mixtures balanced
  • Avoid scrubbing paint aggressively into the surface
  • Learn moderate lean mixture ratios
  • Apply thin layers with controlled brushwork

Helpful Materials or Techniques

  • Gamsol odorless mineral spirits
  • Controlled lean mixtures
  • Thin layered underpainting
  • Balanced oil-to-solvent ratios
  • Moderate brush loading

Paint That Feels Too Stiff or Draggy

Oil paint that feels stiff, resistant, or difficult to move across the canvas can make blending frustrating and reduce brush control. Some drag is normal in oil painting, especially on absorbent surfaces, but excessive resistance often indicates an imbalance between the paint, surface, and medium.

This problem commonly appears on highly absorbent gesso surfaces, during dry studio conditions, or while using fast-drying pigments.

Artist struggling with oil paint dragging and skipping across an absorbent canvas surface during painting
An overly absorbent painting surface can cause oil paint to drag, skip, and break apart during brush application instead of flowing smoothly across the canvas.

What Causes It

  • Overly absorbent canvas surfaces
  • Insufficient medium
  • Fast-drying pigments
  • Paint drying too quickly on the palette
  • Excessively dry studio conditions
  • Overworked paint layers

How to Fix It

  • Add a small amount of medium gradually
  • Use softer brushes when blending
  • Lightly oil out dull absorbent areas if necessary
  • Improve palette management during longer painting sessions
  • Work in smaller controlled sections

Many artists mistakenly continue adding more oil whenever paint begins dragging. Often the better solution is improving surface preparation or adjusting brush pressure rather than flooding the paint with medium.

How to Prevent It

  • Prepare canvases properly
  • Maintain balanced paint consistency
  • Use covered palettes or sealed palette containers to slow paint drying during longer sessions
  • Avoid excessively absorbent surfaces
  • Use medium carefully and intentionally

Helpful Materials or Techniques

  • Walnut oil
  • Refined linseed oil
  • Soft synthetic brushes
  • Properly prepared gesso surfaces
  • Controlled oiling out techniques

Uneven Drying Between Colors

Different oil paint pigments naturally dry at different speeds. Some colors may become touch dry within a day or two while others remain wet significantly longer. This uneven drying behavior is completely normal in oil painting, although it can surprise beginners who expect all colors to cure evenly.

Paint brand formulation, paint thickness, medium usage, and environmental conditions can also influence drying differences across a painting.

Artist oil paint palette showing some pigments drying glossy while others appear matte and more cured
Different oil paint pigments dry at different rates. Darker colors and certain reds may remain glossy and tacky longer, while many earth tones dry faster and appear more matte.

What Causes It

  • Natural pigment drying differences
  • Slow-drying blacks and reds
  • Thick paint passages
  • Uneven medium usage
  • Paint brand formulation differences

How to Fix It

  • Allow slower areas additional curing time
  • Adjust workflow around slower pigments
  • Use alkyd mediums selectively when necessary
  • Avoid rushing additional paint layers
  • Keep paint thickness relatively balanced

Understanding pigment drying behavior helps artists plan painting sessions more effectively and avoid disturbing partially cured passages.

How to Prevent It

  • Learn common pigment drying characteristics
  • Avoid excessively thick slow-drying paint layers
  • Use balanced medium mixtures
  • Work patiently between layers
  • Build painting stages gradually

Helpful Materials or Techniques

  • Alkyd mediums
  • Controlled pigment selection
  • Balanced paint thickness
  • Organized painting workflow
  • Thin layered applications

Understanding Oil Paint Drying vs Curing

One of the most misunderstood aspects of oil painting is the difference between paint feeling dry on the surface and the paint film actually being fully cured.

Oil paint may become dry-to-touch relatively quickly while still remaining soft underneath. A painting that feels dry after several days may continue curing internally for weeks or months depending on paint thickness, pigment type, medium usage, and environmental conditions.

Artist gently touching an oil painting surface to test whether the paint is dry to the touch or still curing underneath
Oil paint may feel dry on the surface while thicker underlying layers continue curing internally for weeks or even months.

Dry-to-Touch

The paint surface no longer feels wet and can usually be touched lightly without transferring paint.

Workable Dry

The paint has stabilized enough for careful additional layering or controlled overpainting.

Fully Cured

The paint film has completed the majority of its oxidation process and developed greater long-term stability.

Thicker paint applications, stand oil mixtures, and slow-drying pigments can significantly increase curing time. Paintings should be allowed adequate curing time before varnishing to help ensure long-term surface stability.

Approximate Drying Expectations

  • Thin lean layers: several days
  • Moderate paint layers: 1–2 weeks
  • Thick impasto passages: weeks to months
  • Fully cured paintings: several months or longer

Environmental conditions and medium choices can alter these timelines considerably.

Common Fast- and Slow-Drying Oil Paint Pigments

Understanding pigment drying behavior can help artists better predict paint handling, layering schedules, and curing times.

Artist Palette Showing Common Fast- and Slow-Drying Oil Paint Pigments
Common oil paint pigments dry at different rates. Faster-drying earth tones and lighter pigments are arranged along the upper row, while many slower-drying reds, blues, browns, and blacks appear along the lower row.

Faster Drying Pigments

  • Burnt Umber
  • Raw Umber
  • Cobalt Blue
  • Venetian Red
  • Earth colors in general

Slower Drying Pigments

  • Ivory Black
  • Alizarin Crimson
  • Cadmium colors
  • Titanium White
  • Some modern synthetic pigments

These differences are normal and are one reason why some colors feel softer or tackier longer than others during painting sessions.

Understanding Oil Painting Mediums and Drying Behavior

Different oil painting mediums affect paint consistency, gloss, drying speed, and blending behavior in very different ways. Understanding which medium is appropriate for each stage of painting can greatly improve paint handling and reduce many common drying problems.

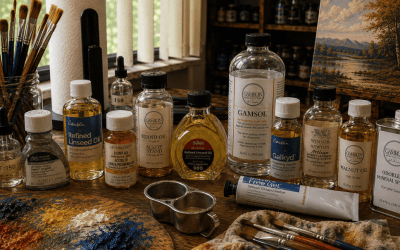
Oil painting mediums including Liquin, Galkyd, stand oil, brushes, paint tubes, and mixing container arranged on a realistic artist studio table
Different oil painting mediums affect drying speed, paint flow, gloss, and handling characteristics. Fast-drying alkyd mediums, Liquin, and slower oils such as stand oil are commonly used during different painting stages.

Common Medium Types

Refined Linseed Oil

A traditional all-purpose oil medium that improves paint flow and flexibility while moderately extending drying time.

Stand Oil

A thicker glossy oil medium often used for glazing and smooth enamel-like finishes. It extends blending time but can significantly slow curing in thicker applications.

Walnut Oil

A smoother slower-drying oil medium favored by some artists for blending and lighter color work.

Safflower Oil

Often used in whites and pale colors because it yellows less, although it dries slower than linseed oil.

Alkyd Mediums

Fast-drying mediums such as Winsor & Newton Liquin that accelerate drying and allow quicker layering.

Environmental Factors That Affect Drying

Temperature, airflow, and humidity can dramatically affect how oil paint behaves while drying and curing. Many artists assume their paint or medium is causing problems when the actual issue comes from unstable studio conditions.

High humidity can slow oxidation and extend drying times considerably, while cool rooms may keep paint soft or tacky longer than expected. Poor airflow can also slow curing by reducing oxygen circulation around the paint surface.

Oil painting studio setup with airflow fan, temperature and humidity monitor, painting mediums, and artist tools arranged near a window
Stable temperature, controlled humidity, and steady airflow all play an important role in how oil paint dries and cures. Proper studio conditions help reduce tackiness, uneven drying, and surface defects.

Common Environmental Issues

  • High humidity slowing paint curing
  • Cold studio temperatures
  • Poor airflow around paintings
  • Enclosed storage areas trapping moisture
  • Paint drying unevenly in changing conditions

Helpful Environmental Practices

  • Maintain steady room temperatures when possible
  • Keep humidity levels lower and stable
  • Use gentle airflow to improve oxygen circulation
  • Avoid storing wet paintings in enclosed damp spaces
  • Monitor studio conditions during seasonal changes

Small environmental improvements can greatly improve drying consistency and overall paint stability.

Typical Medium Usage by Painting Stage

Oil painting mediums and lean-to-fat paint mixtures arranged on a studio worktable beside brushes, palette knife, and staged paint consistency examples in a traditional artist workspace.
Different oil painting medium mixtures arranged from lean to rich demonstrate how paint consistency changes throughout the painting process, from thin underpainting layers to thicker final applications.

Early Blocking-In Stages

  • Leaner paint mixtures
  • More solvent
  • Faster drying mediums
  • Thin applications

Middle Painting Stages

  • Balanced paint structure
  • Moderate medium usage
  • Controlled layering

Final Layers and Glazing

  • Fatter paint mixtures
  • More oil content
  • Glazing mediums
  • Smoother blending

Common Lean Mixture Example

  • 1 part linseed oil
  • 2–3 parts odorless mineral spirits

This type of lean mixture is often used during early underpainting stages where faster drying and thinner applications are desired.

More medium does not always improve paint handling. Excessive oil or solvent usage often creates additional drying, adhesion, and surface problems rather than solving them.

Final Thoughts

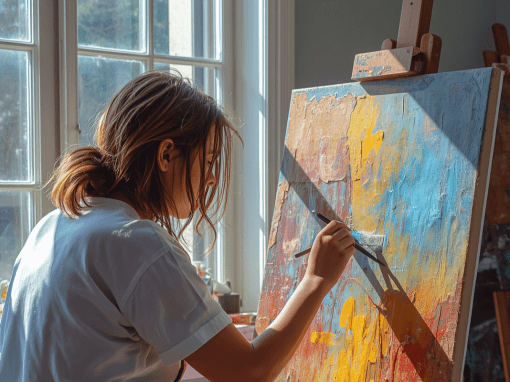
Artist painting textured abstract artwork beside a sunlit studio window during the final stages of an oil painting session.
An artist refining layered brushwork and texture during the later stages of an oil painting session in a naturally lit studio environment.

Oil painting is naturally slower and more variable than many other painting mediums. Drying times change depending on pigment type, paint thickness, environmental conditions, and the mediums being used throughout the painting process. Understanding how oil paint behaves while curing helps artists make better decisions involving layering, blending, glazing, and overall workflow.

Many drying and consistency problems improve significantly once artists learn how to balance paint structure, medium usage, surface preparation, and patience between layers. In many cases, oil paint is behaving exactly as it was designed to behave — the key is learning how to work with those characteristics rather than fighting against them.

As your understanding of oil paint handling improves, controlling drying speed, paint consistency, and layering stability becomes far easier and far more predictable over time.

Explore More

Disclaimer

This page may contain Amazon advertisements or affiliate links; however, the article content itself is not sponsored by or affiliated with Amazon. Product availability and pricing, where shown, are provided for general informational purposes and may vary over time. All information reflects conditions at the time of posting and is subject to change without notice.

Banner promoting art supplies on Amazon including paints, brushes, and creative materials.

You May Also Like…